Sunday, January 31, 2016

Shocking Progress

Moving along on my punch list..... I started on the suspension. I expected the shocks would be bad, siting in the same position for 15 years has a tendency to cause issues. My experience has also shown me that removing the shocks can be a pain, the nuts stick causing the shaft to spin, not loosen. As I lay under the 55 ready to remove the nut, I said a prayer and hoped for the best.


Lucky for me, the bolts came out easily. Once I removed all four, I tested them by compressing the shocks. What should have been difficult was very easy, no resistance! Here they are, five minutes after I compressed them, no movement back to extension......DOA!


Hello new shocks!!!


Sway bar links....
I replaced the rear sway bar links with a more robust option with polyurethane bushings. I will be doing the same on the front sway bar.

Before


After

I plan to have the rear end inspected to make sure it is in good condition and have any issues corrected. I hope, since the transmission was fine, that the same can be said for the rear end... Fingers crossed. I am also going to take the opportunity to have the drive line upgraded with  a beefier drive shaft, transmission output shaft, and rear end pinion yoke. My wife's Acadia, comes in handy !!


I was going to replace the gas tank sending unit, but two stripped screws brought that to a screeching stop. Once I get a set of EZ outs, I will try again.

With the drive line, rear end, shocks, and springs removed, their is plenty of room to inspect the undercarriage for issues and to do some TLC and cleaning.


The body has held up very well, the paint is great, but there are a few little issues. One area, is around the driver's side mirror. The paint has discolored around the gasket, not sure what caused it and if it can be corrected without paint work. I don't have plans to correct that now, as my goal is to get the 55 reliably running so it can be enjoyed!!


Wednesday, January 27, 2016

Birthday!!!

My schedule has kept me away from the 55 for a few weeks, so i am really excited to get back to work.

I am not a big social media nut, but i do use facebook and every once in a while it pays off big.  I belong to several classic chevy groups and one day i caught a post by another 55 owner that lead to some good info regarding my 55.  The person posted the birth date of his 55. That got me to thinking, could i find out the day my 55 was built??

I was surprised how quickly i was able to locate production documents for 1955. That, coupled with decoding my VIN number, i was able to determine the following: My 55 was built on Friday, May 20th 1955 sometime in the morning at the Baltimore Maryland plant.


Decoded VIN: B=55, C=B, D=133571


Production sheet:
The last VIN on Thursday the 19th was 133560 and the last VIN on the 20th was 134349. That means they produced 789   55 chevys on Friday and since my VIN would have been the 11th car produced that day, it is safe to guess it would have been early in the morning.  What is really cool is, the document also shows the days the plant was down for repairs or to change out tooling.... Check out the full document below. You can also see 56 and 57

http://www.trifive.com/forums/showthread.php?t=70517

Saturday, January 16, 2016

Drive train and suspension

Progressing.......

As you know, if you have been following my posts, I pulled the trans and was going to have it gone over.  I dropped off the trans to a local transmission specialist for a thorough inspection, I picked up the trans Friday and it passed with flying colors.  Some slight wear on the reverse gear, but that is normal and it was well within spec. They noted that who ever last worked on it, used RTV and not gaskets.... The shop corrected that, so now it looks a lot better and will not leak.  They cleaned it up as well. 


Before       


After


The next large item to address is the rear end.  Since the rear end was rebuilt the same time as the trans, I am even more optimistic that it wont need any repairs, maybe new axle bearings, but even that isn't a big deal.  I have been spending a lot of tile playing detective, under the car, as I go over it from front to back noticing items either missing or in need or repair or replacement.  It pays to have an assembly manual or the link to an online version.  The assembly manual shows where everything should be and how it is put together. 

When I was driving the car (late 90's), I remember when the car hit bumps and the suspension was really working, I would always hear a loud noise, sounded like the suspension was bottoming out.  That has been on my mental checklist to figure out.  As I was looking over the suspension and checking suspension parts in my parts catalogs (Danchuk and Lutty's chevy) I noticed they listed upper and lower rear axle bushings.  I consulted the assembly manual to see the drawing of their location, I quickly realized I was missing them.  The noise I always heard was the rear axle hitting the underside of the frame.  The bushing prevent that from happening!

http://www.trifive.com/garage/55%20Chevy%20Assembly%20Manual/4-4.gif


If you want to take a glimpse into how a 1955 Chevy Bel Air is put together, follow this link, it is the full shop assembly manual.  It is an absolute must have when restoring one of them.  Consider it the cars bible!!!
 

The bumpers and their brackets are missing from my rear end.  The bumpers should be on either end of the axels next to the "U" bolts. The "U" bolts hold the bumper brackets to the axle.
 
I am also going to replace the sway bar links that connect from the frame to the ends of the sway bar.


Mine are a little tired....


When I test fit the rear break calipers (92 Chevy S-10) I realized that the disc brake conversion kit required a little hump in the casting to be ground flat.  That only took be a few minutes with a grinder


Tuesday, January 5, 2016

Moving right along

I was thinking about the last three months, the progress made and what is left to do. I feel great about what I have accomplished. Going into this, I had my moments of doubt..... Could I handle the work? Could I get things done working solo? Could I do quality work? Would i feel that my dad would approve and be proud of me? I can honestly say yes to all those questions.

I have now gotten to the point where I have to decide if I am going to make any changes. With the rear end out, there are parts that need touched up. Do I keep the color matched parts as is, or do I make color changes. I am thinking of painting some of the suspension pieces black. Now is the time to do it since everything is out and easily accessible. I hesitate to make changes because the car sits the way he wanted it done. Hopefully he will send me a sign.

I was always under the impression that the 4 speed was a Muncie M22 rock crusher.  The M22 has a distinctive sound, a whine, when running. I never remember hearing that sound, so i decided to find out once and for all. With the trans out I researched how to decide the VIN. Here is the VIN and how it decodes.

VIN = P9R28A
P = MUNCIE PLANT
9 = 1969
R = OCTOBER
28 = 28th
A = M20

Not a disappointment, but the trans is a M20 not a M21 or M22.


I took time to tally some numbers. Keeping this budget tight is very important. This is a very important project to me, but it is equally important that it not take time away from my family or become financially burdensome. The biggest saving is labor cost. Shops average 70.00 per hour.  For example, to have a hot rod shop do the work,  it was $10,000 to $15,000 and $8,000 was just labor. Since I started work in October of last year, doing the work myself, I have saved over $3,000 on labor. The only work I will not be able to do myself is the engine installation. I am leaning towards a GM Crate motor. It will need to be installed my a certified GM mechanic according to the warranty.

Saturday, January 2, 2016

Drive train removal

2016 is here and what better way to bring in the new year than to drop the drive train for inspection!

Besides the engine, the trans and rear end are the last of the big items to get the once over. Everything went well, removing the necessary items to drop the rear end, was straight forward.

Sway bar 


Rear shocks


Leaf Springs


The '55 has a disc brake attached to the drive shaft, as the parking brake, instead of attached to the rear brakes.


After that, the unit dropped out


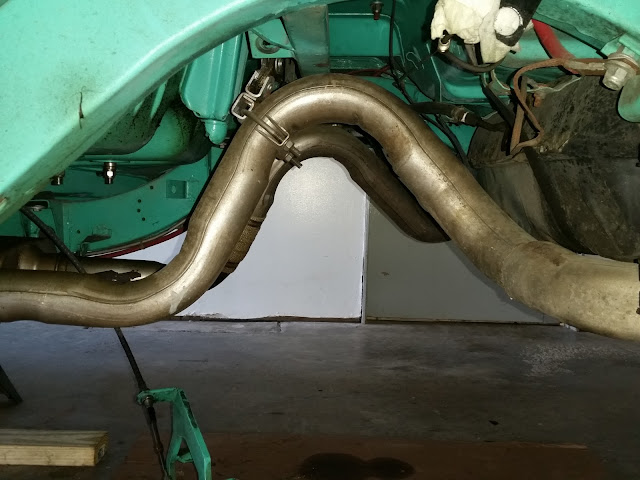
Next was the transmission. After a few hours of wrenching, I was able to get it out. All together,  I worked from 9am to 3pm, and boy was I exhausted. Working solo can make it rough, but very rewarding. I have my fingers crossed that the rear end and transmission just need fresh fluids and minor TLC. I will be dropping each of them off to be serviced. 

Having the peace of mind, that my drive train will be reliable and fresh, will make driving the '55 even more enjoyable.