Sunday, March 6, 2016
Caliper Color
When i had the brakes mocked up on the rear end, i began to think that coating the calipers would be a good look. If i don't like the look once the wheels are on and the car is together, i can always change them back.
Rear end
I picked up the rear end and drive shaft, I had a local company Drive Line Services of Pittsburgh service it. Everything checked out fine, I had them replace the universal joints and they balanced the drive shaft. I found a product that is applied to frames that creates a rock hard yet flexible finish that is resistant to all fluids. KBS Black Top.
https://www.kbs-coatings.com/blacktop.html
I decided to use it to detail the rear end, carrier, and drive shaft. The carrier i did in Red Oxide, factory color.
I mocked up the the brakes to see how the color of the rotor and caliper looked. I am thinking I may coat the calipers the same red oxide as the rear end carrier.
I also decided to color fill the "HURST" on the shifter.
When the rear end was at the shop I had them tell me the gear ratio (3.70), so I could get the correct speedometer gear for the transmission. Using an online calculator, I was able to determine I need a 24 tooth gear.
Calculator - http://www.5speeds.com/calculators/SpeedoCalc.html
I ordered the gear and a new speedometer cable bullet.
Details Details Details
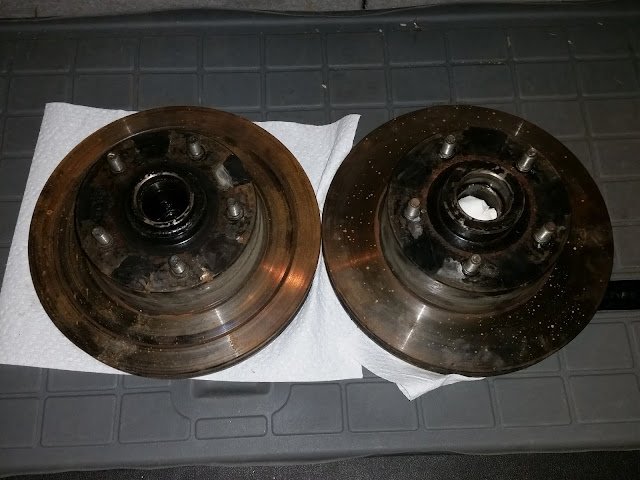
I pulled the front rotors off the 55 so I could clean and detail them to match the calipers. Man o man did they come out great. With every item I check off the punch list, I get more and more excited.
Before:
After:
I took the rear end and drive shaft to Drive lines of Pittsburgh, to get a good once over. The differential came back with a clean bill of health. New Universal's and balancing took care of the driveshaft.
I plan to coat all the components to add contrast, that will be another post.
Before:
After:
I took the rear end and drive shaft to Drive lines of Pittsburgh, to get a good once over. The differential came back with a clean bill of health. New Universal's and balancing took care of the driveshaft.
I plan to coat all the components to add contrast, that will be another post.
Sunday, February 28, 2016
The devil is in the details
The nice thing about this re-restoration is that I have time and resources to do things right, meaning having the garage space and tools to work on the car and take care of things the right way. I could have just threw things together quickly to speed up the process, but that wouldn't be the proper way to honor my dad's memory or end up with a reliable cruiser. My father, like his father, loved to repair and rebuild anything, they both knew the importance of taking care of t he details, doing a project correct the first time. Even if noone noticed or could see the extra care put into a job, they knew it.
Pulling the radiator, heater core, transmission and rear end to have them checked and serviced if needed, makes sense in order to ensure its reliability. Going through the entire braking system, replacing components as needed makes perfect sense. Some would say, that taking the time to detail parts that are only seen while under the car, or when the wheels are off, is a waste of time... I don't see it that way... I see it as a way to reconnect with the car and my father. When the car was first restored he wanted the undercarriage to be as nice and clean as the outside. I am just honoring his wish by returning it to the condition it was in 1997. When my family and I cruise in the car and people ask us what was done, I can feel proud that all the work was done in my dad's memory and I did the work. I will know the car inside and out. I will have had a hand in all mechanical aspects.
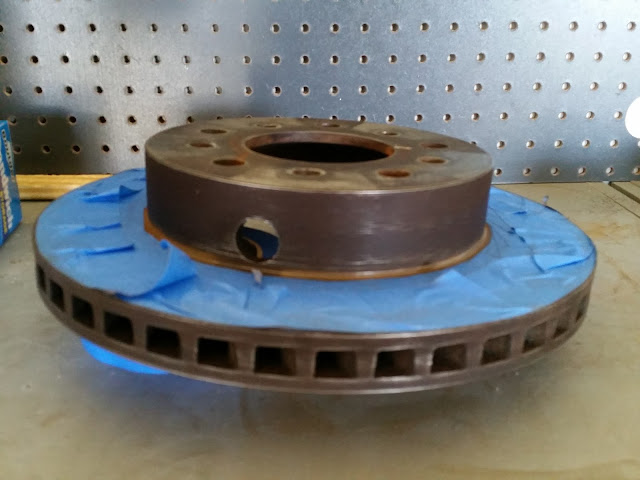
So... Today I detailed the calipers and rear rotors, I will detail the front rotors soon. Detailing, not only makes them look clean, but it will prevent rust. I also pieced the motor back together, so it is ready to be pulled out.
Brakes:
Motor: Seeing it together almost made me forget its blown and I couldn't turn the key and take it for a drive.

Subscribe to:
Posts (Atom)


